
Why Kitchen Cabinet Door Installation Can Transform Your Space for Half the Cost

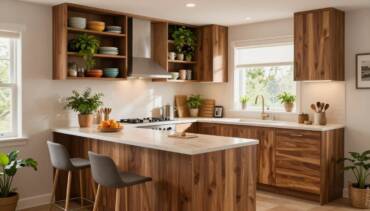
Kitchen cabinet door installation is one of the smartest ways to update your kitchen without breaking the bank or your schedule. Instead of spending $15,000-30,000 on full cabinet replacement, you can achieve a stunning change for as little as $850 for 18 pieces – that’s a fraction of the cost while delivering maximum visual impact.
Quick Installation Overview:
- Choose your door type – Full overlay, partial overlay, or inset
- Measure accurately – Cabinet openings, hinge positions, and overlay calculations
- Prep your workspace – Gather tools like 35mm Forstner bit and soft-close hinges
- Install hinges – Either pre-bored or DIY drilled at 1.5-2 inches from edges
- Hang and align – Use painter’s tape guidelines for consistent reveals
- Add hardware – Install knobs/pulls with consistent spacing
For busy NYC and NJ homeowners, this approach offers the perfect balance of high-impact results with minimal disruption. Professional installation typically costs $500-1,000 depending on kitchen size, but many homeowners can tackle this as a weekend DIY project.
The key to success lies in understanding the three main door types and their installation requirements. Full overlay doors cover the entire face frame and maximize storage access. Partial overlay doors leave part of the frame visible and offer more forgiving installation tolerances. Inset doors sit flush inside the frame opening but require precise measurements with 1/8″ to 1/4″ reveals.
Most cabinet doors should overlap openings by 3/4 inch, and hinges perform best when placed 1.5-2 inches from top and bottom edges. With lead times around 4 weeks for custom doors, proper planning becomes crucial for timeline-conscious homeowners.

Step-By-Step Planning for Kitchen Cabinet Door Installation

The difference between a smooth kitchen cabinet door installation and a weekend that tests your patience comes down to one thing: planning. We’ve seen too many homeowners rush into this project only to find their measurements were off by just enough to make everything complicated. Take the time to plan properly, and you’ll thank yourself later.
Think of this phase as building your roadmap. You wouldn’t drive across the country without knowing your route, and you shouldn’t tackle cabinet doors without understanding your specific situation. Your cabinet construction, door style preferences, and existing hardware all play crucial roles in determining your approach.
Choose Your Door Type & Overlay
Walking into a showroom and seeing dozens of door styles can feel overwhelming, but the decision becomes simpler when you focus on what works with your existing cabinets. Shaker doors continue to dominate kitchen designs because they’re like the perfect white t-shirt – they work with everything and never go out of style. The clean lines complement both farmhouse charm and modern minimalism.
Raised panel doors bring traditional elegance but commit you to a more classic aesthetic. They’re gorgeous in the right setting but can feel heavy in smaller kitchens. Flat panel doors offer the most flexibility – paint them bold colors, add interesting hardware, or keep them simple. They’re also the most budget-friendly option for most homeowners.
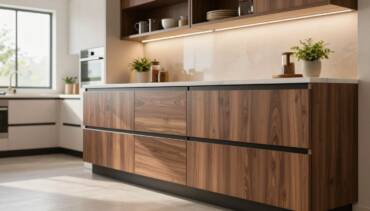
Material choice matters more than you might think. Paint-grade maple gives you real wood durability with a smooth surface that takes paint beautifully. MDF works perfectly for painted finishes and costs less, though it’s not as forgiving if you need to adjust hinges multiple times. Natural wood species showcase beautiful grain but limit your color options.
Now comes the overlay decision that affects everything else. Full overlay doors completely hide the face frame, creating that sleek, modern look you see in magazines. They maximize your storage access since there’s no frame in the way, but they demand precision – adjacent doors can’t touch each other.
Partial overlay doors leave some frame visible and offer much more forgiveness during installation. The gaps between doors hide minor measurement errors, making them perfect for confident DIYers who want room for small mistakes. Full inset doors create that custom, furniture-like appearance but require surgical precision with consistent reveals around every edge.
Here’s the reality check: full overlay looks amazing but requires accurate measurements and careful installation. Partial overlay gives you breathing room. Inset doors look incredible but should probably be left to professionals unless you’re very experienced with precision work.
Measure Twice, Order Once for Kitchen Cabinet Door Installation
This old saying exists because cabinet doors can’t be returned if you measured wrong. We’ve learned this lesson the expensive way more than once. Start by creating a simple sketch of your kitchen layout, numbering each cabinet and noting which way the doors swing.
Hinge-bore centers become critical if you’re reusing existing holes. Measure from the top and bottom of your current doors to the center of each hinge. These measurements need to match your new doors exactly, or you’ll be drilling new holes.
The 3⁄4″ overlap rule applies to most overlay installations – your door extends 3⁄4 inch beyond the cabinet opening on all sides. But don’t assume this without checking your existing doors first. Some installations use different overlays, and you want your new doors to match the proportions.
Overlay math sounds complicated but it’s straightforward. For a cabinet opening that’s 12 inches wide, a full overlay door would be 13.5 inches wide (12 + 3⁄4 + 3⁄4). For inset doors, you subtract your desired reveal – typically 1⁄8 inch on all sides.
Take detailed photos before removing anything. These become invaluable references when you’re trying to remember which door went where or how the hinges were originally positioned. Label everything with painter’s tape as you remove it.
Lead time runs about 4 weeks for custom doors, so order before starting any demolition. Nothing’s worse than having a kitchen out of commission for an extra month because you didn’t plan ahead. Rush orders exist but cost significantly more.
More info about Kitchen Measurement & Layout Verification
Gather Tools & Prep the Boxes
The right tools transform kitchen cabinet door installation from a frustrating puzzle into a satisfying project. You don’t need a professional workshop, but certain tools make the difference between success and struggle.
Your 35 mm Forstner bit becomes essential if you’re drilling hinge holes yourself. This creates the clean, precise cups that European hinges require. A regular drill bit won’t work – you need the flat-bottomed hole that only a Forstner bit provides.
Soft-close hinges have become standard for good reason. They prevent slamming, reduce wear on your cabinets, and make your kitchen feel more upscale. European concealed hinges adjust in three directions, letting you fine-tune alignment even after installation.
Painter’s tape serves multiple purposes throughout the project. Use it for labeling removed doors, creating guidelines during installation, and protecting surfaces from scratches. A spirit level ensures your doors hang straight – crooked cabinet doors scream amateur installation from across the room.
Safety glasses aren’t optional when drilling. Wood chips and dust will fly, and protecting your eyes should be automatic. A dust mask helps too, especially when working with MDF doors.
Cabinet preparation sets the foundation for everything else. Remove all existing doors and hardware, taking photos and labeling positions as you go. Clean the cabinet boxes thoroughly – years of cooking residue can interfere with hinge mounting.
Check that your cabinet boxes are square and plumb during prep. Minor issues can be corrected with shims, but major problems need professional attention. It’s better to find structural issues now than after you’ve hung expensive new doors.
Mount, Align, and Finish – Bringing Your Cabinets to Life

This is where your planning transforms into reality. After years of helping NYC and NJ homeowners with their kitchen cabinet door installation projects, we’ve learned that patience during this phase makes all the difference. The mounting and alignment process separates weekend warriors from true craftspeople – and honestly, it’s where most DIYers either shine or call for backup.
Take a deep breath. You’ve done the hard work of measuring and planning. Now it’s time to bring those cabinet doors to life.
Drill or Pre-Bore? Hinge Hole Hacks
Here’s the truth nobody wants to hear: drilling perfect 35mm hinge holes by hand is really, really hard. We’ve seen too many beautiful doors ruined by wobbly drill bits and overconfident homeowners. Factory boring is almost always worth the extra cost.
When you order pre-bored doors, you get perfectly positioned 35mm cups every single time. The holes are exactly the right depth – about 13mm – and positioned precisely where they need to be. No guesswork, no “oops, I went too deep,” and definitely no breakthrough disasters that turn expensive doors into expensive firewood.
But if you’re determined to drill your own holes (and we respect the DIY spirit), here’s what you absolutely need to know. Position your holes 3.5 inches from the top and bottom edges of each door. Use a quality 35mm Forstner bit – this isn’t the time to save money on tools. Mark your drilling points with a sharp pencil and double-check every measurement.
Pilot holes make the difference between smooth installation and split wood. Use a 1/16″ bit for softwoods like pine or poplar, and step up to 3/32″ for hardwoods like oak or maple. Drill these pilot holes about 1/4″ deep – just enough to guide your hinge screws without weakening the door.
The mounting plates on your cabinet frames need the same precision. Position them 2.25 inches from the cabinet edge while maintaining your desired reveal. Most professional installations use a tight 1/16″ reveal for that custom, built-in look.
If you’re feeling overwhelmed by the drilling requirements, there’s no shame in having your doors professionally bored. The cost is minimal compared to replacing a door you’ve accidentally ruined.

Hang & Align for Picture-Perfect Kitchen Cabinet Door Installation
Perfect alignment isn’t magic – it’s method. We’ve developed some tried-and-true techniques that make kitchen cabinet door installation look effortless, even when it’s your first time.
The painter’s tape guideline is our secret weapon for consistent door alignment. Stretch a piece of painter’s tape across multiple cabinet faces at exactly where you want your door bottoms to line up. Use your spirit level to make sure this line is perfectly horizontal. This simple reference line ensures every door aligns perfectly, creating that seamless, professional look.
Here’s a trick that might sound crazy but works brilliantly: hot glue. Apply a tiny bead of hot glue to the top of each hinge before positioning the door. This temporarily holds everything in place while you step back and check your alignment. Once you’re happy with the position, drive your screws. The hot glue releases easily and leaves no residue.
Start your installation sequence by mounting the hinge cups in your doors using the screws that came with your hinges. Then install the mounting plates on your cabinet frames. The beauty of European hinges is that you can snap the hinge arms into the mounting plates and immediately see how everything looks.
Consistent 1/16″ reveals around every door edge create that custom, furniture-grade appearance. Uneven reveals scream “amateur installation,” while perfect spacing whispers “professional craftsmanship.” Use thin shims behind your mounting plates if you need to fine-tune the positioning.
Upper cabinets present their own challenges. The height and weight make everything more difficult, so always work with a helper. Consider removing shelves temporarily to reduce weight during installation. Start with your corner cabinets and work outward, using your tape guideline to maintain perfect alignment.
Don’t forget to install bumper pads on the cabinet frames opposite your hinges. These little foam dots prevent doors from slamming against the cabinet boxes and significantly extend the life of your installation.
Wrap-Up: Hardware, Maintenance & Next Steps
The final details separate good installations from great ones. Hardware placement, soft-close adjustments, and smart maintenance planning ensure your new doors look stunning and function smoothly for decades.
Knob placement follows simple rules that create visual harmony. Position knobs on the door stile opposite the hinges, typically 2-3 inches from the corner. For pulls, center them on the stile or position them 2-3 inches from the top on upper cabinets and 2-3 inches from the bottom on lower cabinets.
Make yourself a simple placement jig from cardboard or scrap wood. This ensures every piece of hardware sits in exactly the same spot relative to its door. Mark your holes, drill pilot holes, and install using screws appropriate for your door thickness.
Soft-close mechanisms need fine-tuning after installation. Test each door’s closing action and adjust the mechanism until doors close smoothly without slamming but with enough force to latch completely. This adjustment takes patience but transforms your kitchen’s daily experience.
Your door material determines long-term care. Wood doors need gentle cleaning with mild soap and wood-friendly cleaners – harsh scrubbing damages finishes. Laminate doors are practically maintenance-free, cleaning easily with warm soapy water while resisting warping and fading better than wood.
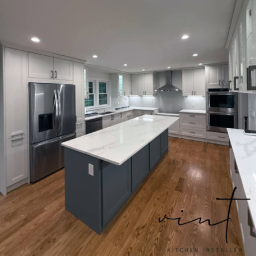
Let’s talk numbers. Your DIY kitchen cabinet door installation should cost around $850 for 18 pieces of quality paint-grade maple doors, plus hinges and hardware. Professional installation adds $500-1,000 depending on complexity. Compare this to $15,000-30,000 for complete cabinet replacement, and you’ll see why this approach makes so much sense.
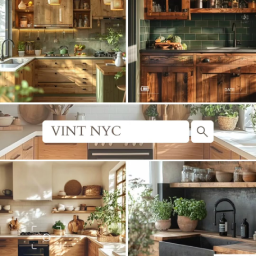
Know when to call for help. Severely out-of-square cabinet boxes, complex corner installations, or tight time constraints might require professional assistance. At VINT Construction & Design, we handle complete kitchen cabinet door installations throughout NYC and NJ with quick turnaround times and code-compliant results.
Take before photos for insurance purposes and keep spare screws handy. Allow your doors to settle for a few days before making final adjustments – wood moves, and hinges need time to find their natural positions. For additional tips and savings on kitchen projects, check out Home Depot’s kitchen improvement blog.
Your kitchen change is complete, but the satisfaction lasts for years. Well-installed cabinet doors improve your kitchen’s appearance, increase your home’s value, and provide daily functional benefits. The investment in quality doors, proper installation, and attention to detail pays dividends in both immediate enjoyment and long-term performance.